Add your first website
Register the site you want to track. Under a minute.
Step 1: Click "Add website"
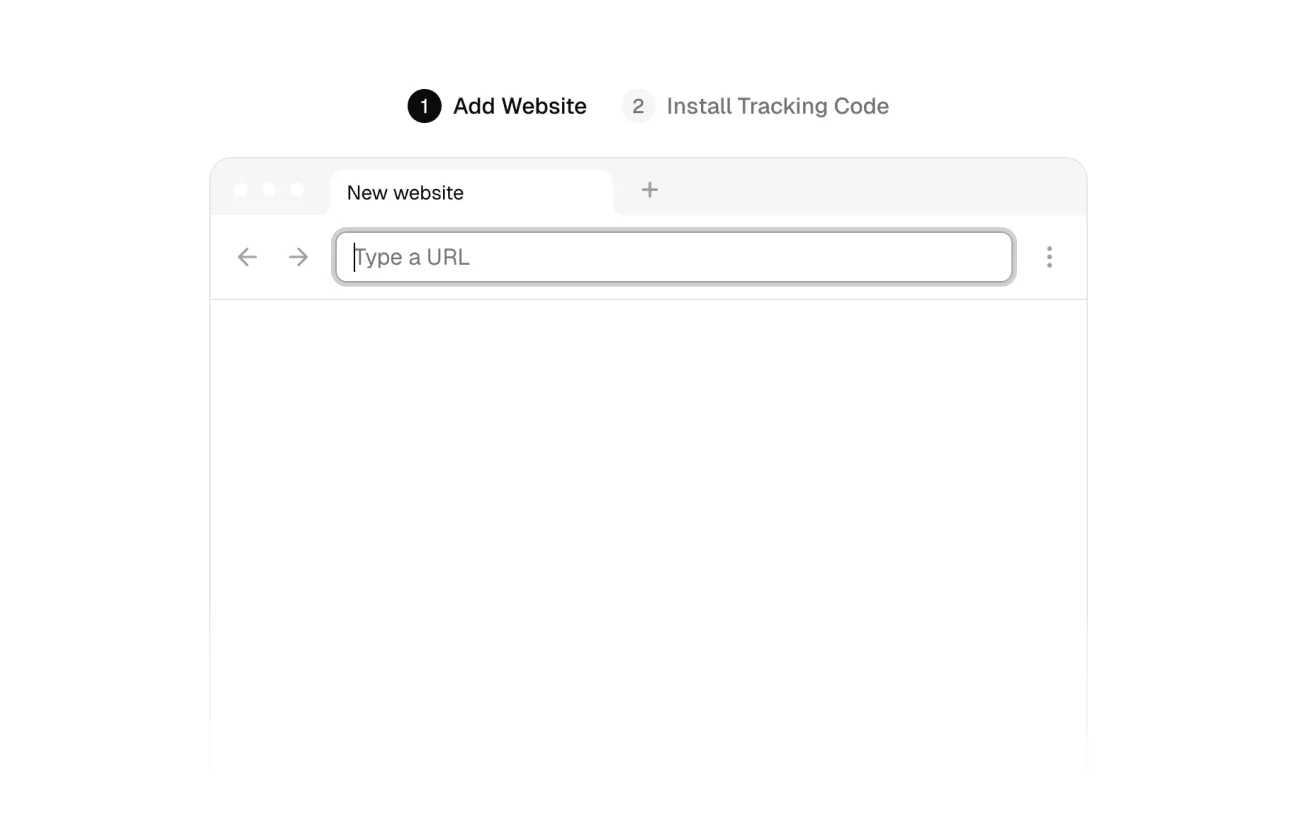
From the main dashboard, click Add website in the top-right corner. New accounts land here automatically right after signup.
Add sites from Google
Already have your sites in Google Analytics or Search Console? Click Import at the top of the form and pick Google Analytics or Google Search Console. After you approve access on Google's screen, Statable lists the properties that account can read. Tick the ones you want and click Add N websites. From Google Analytics each site gets its full history imported; from Search Console each site is linked to its property. One new site opens its dashboard, several open the site list. Rows already in your account are marked Already added. Add a website manually returns to the form.
Step 2: Enter your domain
Use the bare domain. No protocol, no www, no trailing slash.
- Correct:
example.com - Correct:
blog.example.com - Wrong:
https://example.com - Wrong:
www.example.com/
Subdomains are tracked as separate sites by default. To combine example.com and blog.example.com into one dashboard, see the hostname allowlist in site settings → Blocklist → Hostnames.
Domain zones we do not accept
Statable does not take sites in the .ru, .su, .by, .рф and .бел zones, and does not open accounts on email addresses in them either. The reason is jurisdictional rather than technical.
The check matches a whole label, so example.by.com and example.byte are unaffected.
Step 3: Choose a script configuration
Submitting the domain moves you to Install Tracking Code, which shows the snippet to paste and, under it, Script Configuration. Three builds are offered. Pageviews, the privacy guards (DNT, GPC, opt-out) and the window.statable.t() API for custom events ship in every build and have no switch, so the choice only decides what else the script measures. The API works on Nano as well, though data-statable-event markup does not: that arrives with Tagged clicks.
| Preset | Measures | Size |
|---|---|---|
| Standard | Everything in the list below. Recommended. | ~2.3 KB |
| Nano | Pageviews, plus route changes in single-page apps. | ~0.7 KB |
| Custom | Whatever you tick. | Varies |
Custom opens a checklist:
| Feature | Measures |
|---|---|
| SPA navigation | Route changes in single-page apps (pushState / popstate). |
| Custom properties | data-statable-* attributes on the script tag, attached to every pageview. |
| Engagement time | Active time on page (focus, blur, visibility). |
| Scroll depth | How far visitors scroll each page. |
| Session heartbeat | Keeps long sessions alive with a background timer. |
| Outbound links | Clicks on links to other domains. |
| File downloads | Clicks on downloadable files (pdf, zip, and the like). |
| Tagged clicks | Elements marked with data-statable-event. |
| Form submits | Submissions of tagged forms. |
| Status code | A <meta name="status:code"> tag, for error-page tracking. |
| Before-send hook | A data-before-send callback that can change or drop each pageview. |
Scroll depth and Session heartbeat only produce data once Engagement time is on, so they switch on together.
The checklist keeps a running size estimate as you tick. Treat it as approximate: it is a brotli figure, and the exact served size is fixed when the bundle is built.
Pick Nano if you only need traffic counts and every byte matters. Pick Standard otherwise. The configuration is not permanent, so change it later in site settings → General → Tracking Code.
Step 4: Settle the rest afterwards
Creating the site takes only the domain and a script build. Everything else has a working default and waits for you in site settings.
To get there, open the site's dashboard and click the icon next to the site name at the top. It is labelled Settings on hover. That is the site settings every path below starts from.
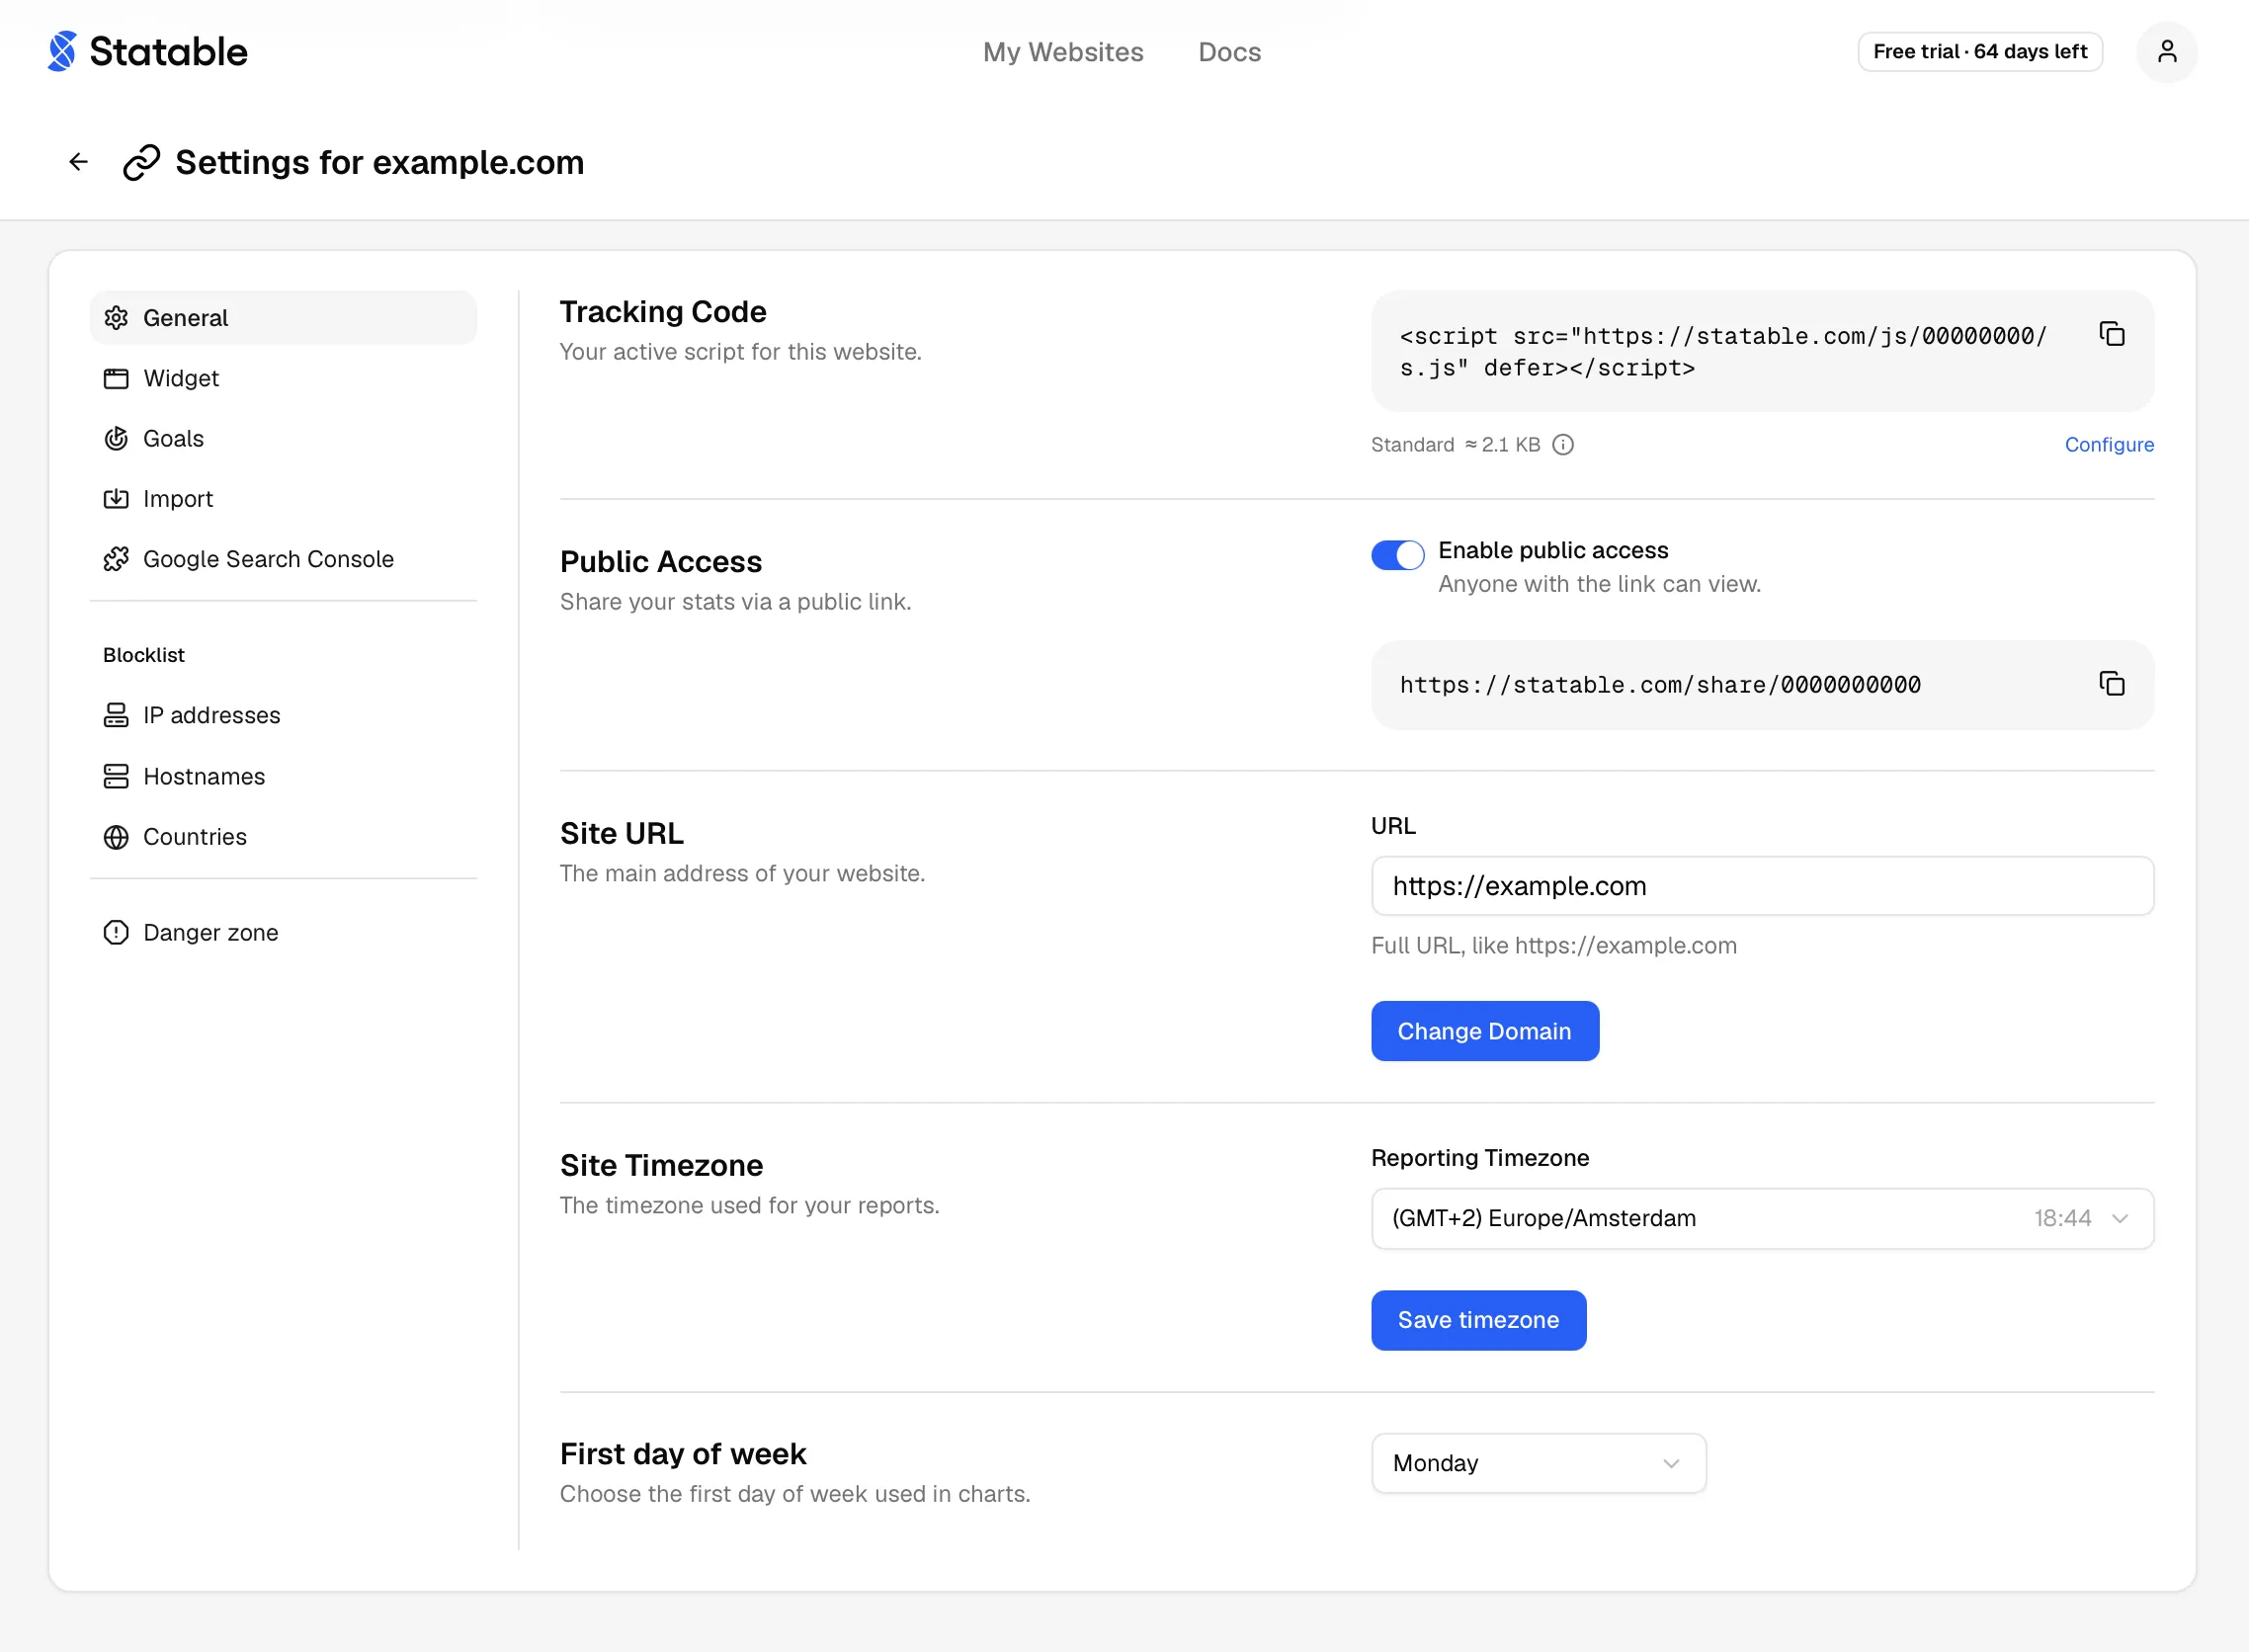
- Timezone. Picked up from your browser when you create the site. It decides how days are bucketed: "Today" means midnight to midnight in this timezone, not the visitor's local time. If you read reports from somewhere else, change it in site settings → General. Past data isn't re-bucketed when you do.
- Public Access. Make analytics visible to anyone with the link. Useful for transparency, open-source projects, or client sharing. Off by default. Toggled in site settings → General → Public Access.
- Site name. Defaults to the domain. Change it for a friendlier label in your sites list (e.g. "Acme Marketing Blog" instead of
blog.acme.com).
Free Trial vs Free Access
Two free tiers, applied automatically based on the domain:
- Free Trial. Any domain. Full features for 30 days, then a 30-day grace period. Pick a paid plan before it runs out, or your sites stop recording new visits.
- Free Access. Permanent free hobby plan, only for
.eduacademic domains and.github.io/.gitlab.ioproject pages. Detected automatically. Hobby installs ship analytics bundled inside a public widget — pick the widget under Site settings → Widget.
Check the badge next to your site name in the sites list to see which applies.
What you get after creation
Two identifiers:
- Site identifier. The
data-idvalue baked into the tracking script. You'll paste this into your snippet on the next page. - Site hash. Used by embed widgets like the live visitor globe or top-countries widget.
Both surface inside site settings → General → Tracking Code and on the install page.
Identifier labels
Field names for these identifiers in the dashboard UI may differ from the wording above. Always copy the prebuilt snippet from Tracking Code rather than re-typing values by hand.
What the screen shows next
Saving creates the site and moves the form to Install Tracking Code: the snippet under Your script to paste, the script configuration, and a bar at the bottom that waits for the first visit.
The bar reads Waiting for your first pageview… until a visit arrives, then First pageview received — tracking works, and Continue opens the dashboard. To install later, press Skip for now — I'll install later. The site's setup screen then shows Ready to start tracking with an Install tracking code card, and changes by itself once the first pageview arrives.
Next: install the script
For metric definitions before you install, the encyclopedia covers sessions, pageviews, and unique visitors.